.png)
How To Create Flex Passes
A Flex Pass (sometimes referred to as a punch pass) allows you to customize the number of scans available to use on any event in the box office, between 5 and 25 scans. Fans can choose to either use it per event (providing entry to multiple people for one event) or using it for multiple events.
Creating Flex Passes
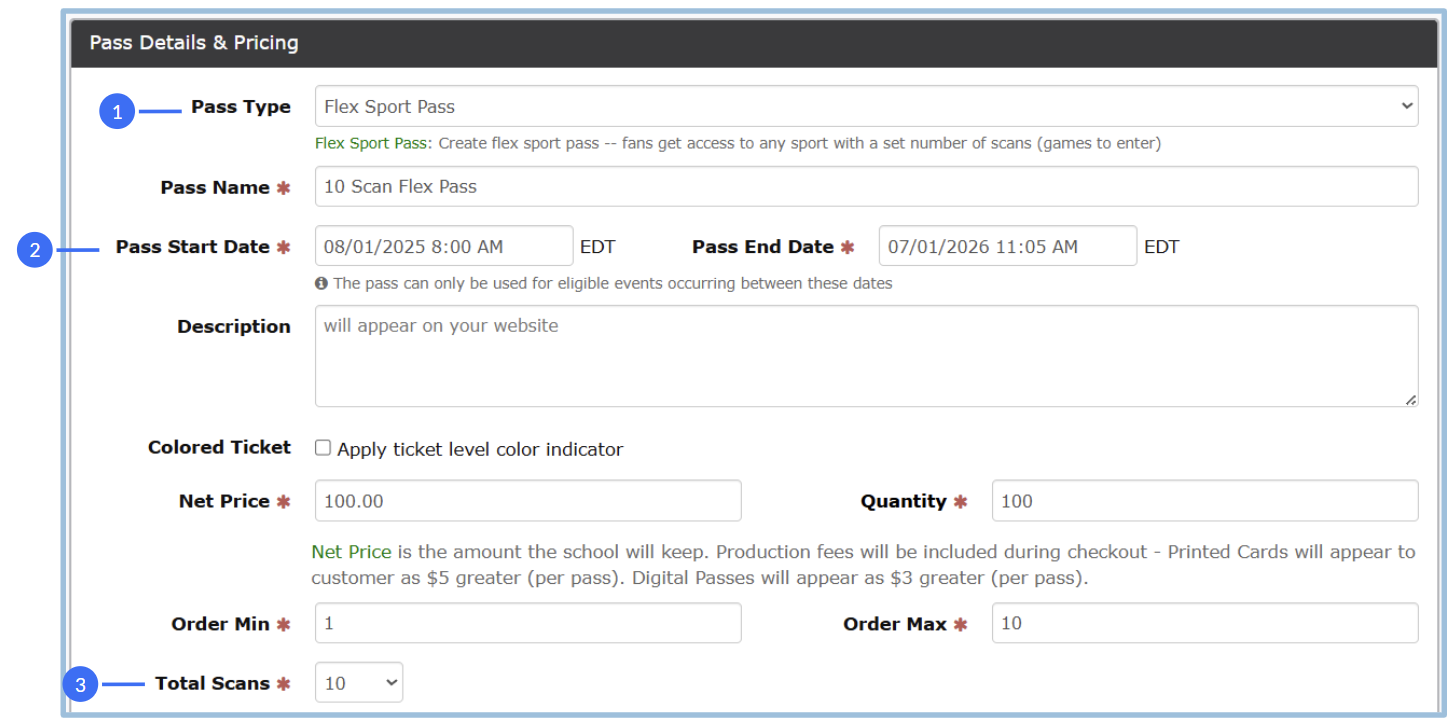
Under Pass Type, change the selection to Flex Sport Pass.
The Pass Start Date and Pass End Date will dictate when these passes can be used for eligible events between these dates.
Complete the rest of the data fields with the Pass Details, designate the Total Scans to be included on these passes and click Next
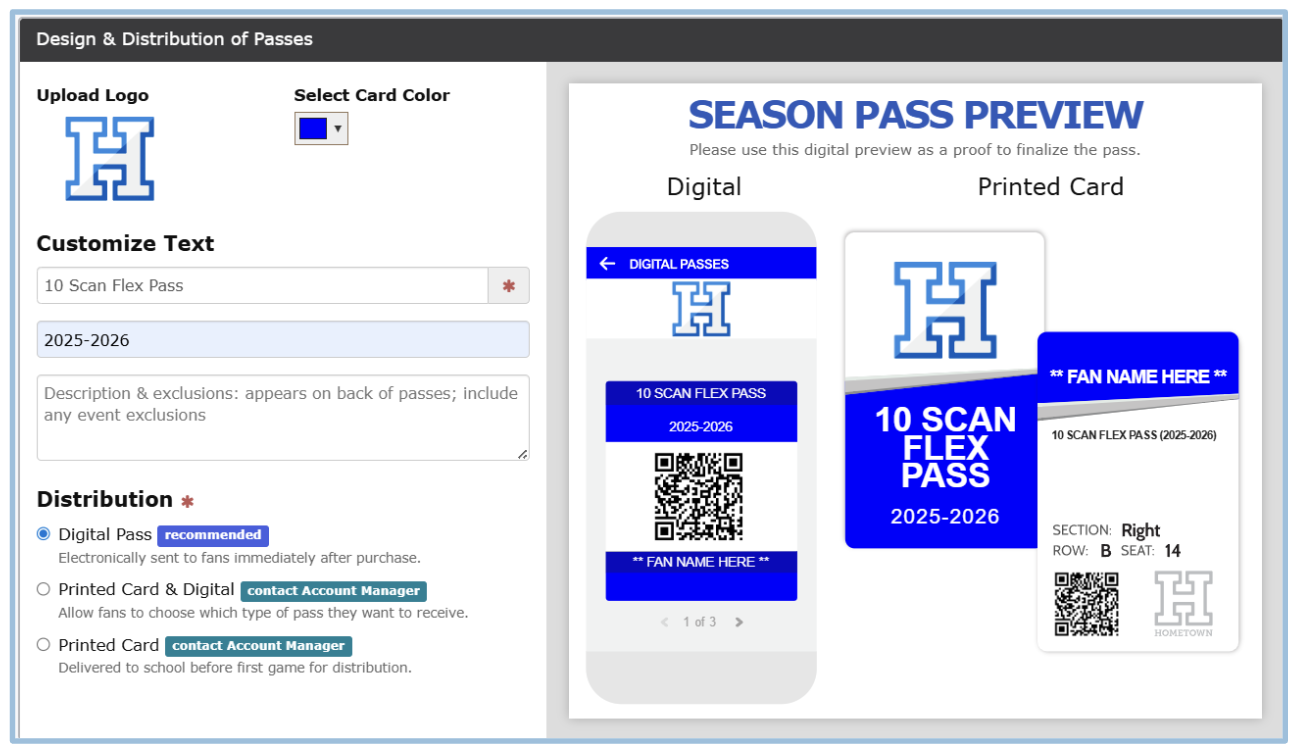
Check the design of what the pass will look like, and make any changes if you wish
Add any additional pass types if needed, click Next once all Pass Types are added. Publish and start selling!