.png)
How To Configure A Seat Map
When selling reserved seats, it’s sometimes necessary to re-configure your reserved seat map. “Configuring a seat map” simply means telling the platform which seats should match which ticket levels/prices, and/or if any seats need to be held or killed so they are unavailable. The seat map can be re-configured at any time, but we recommend not changing anything after ticket sales have begun.
Configuring A Seat Map
Navigate to the event that you need to configure the seat map for.
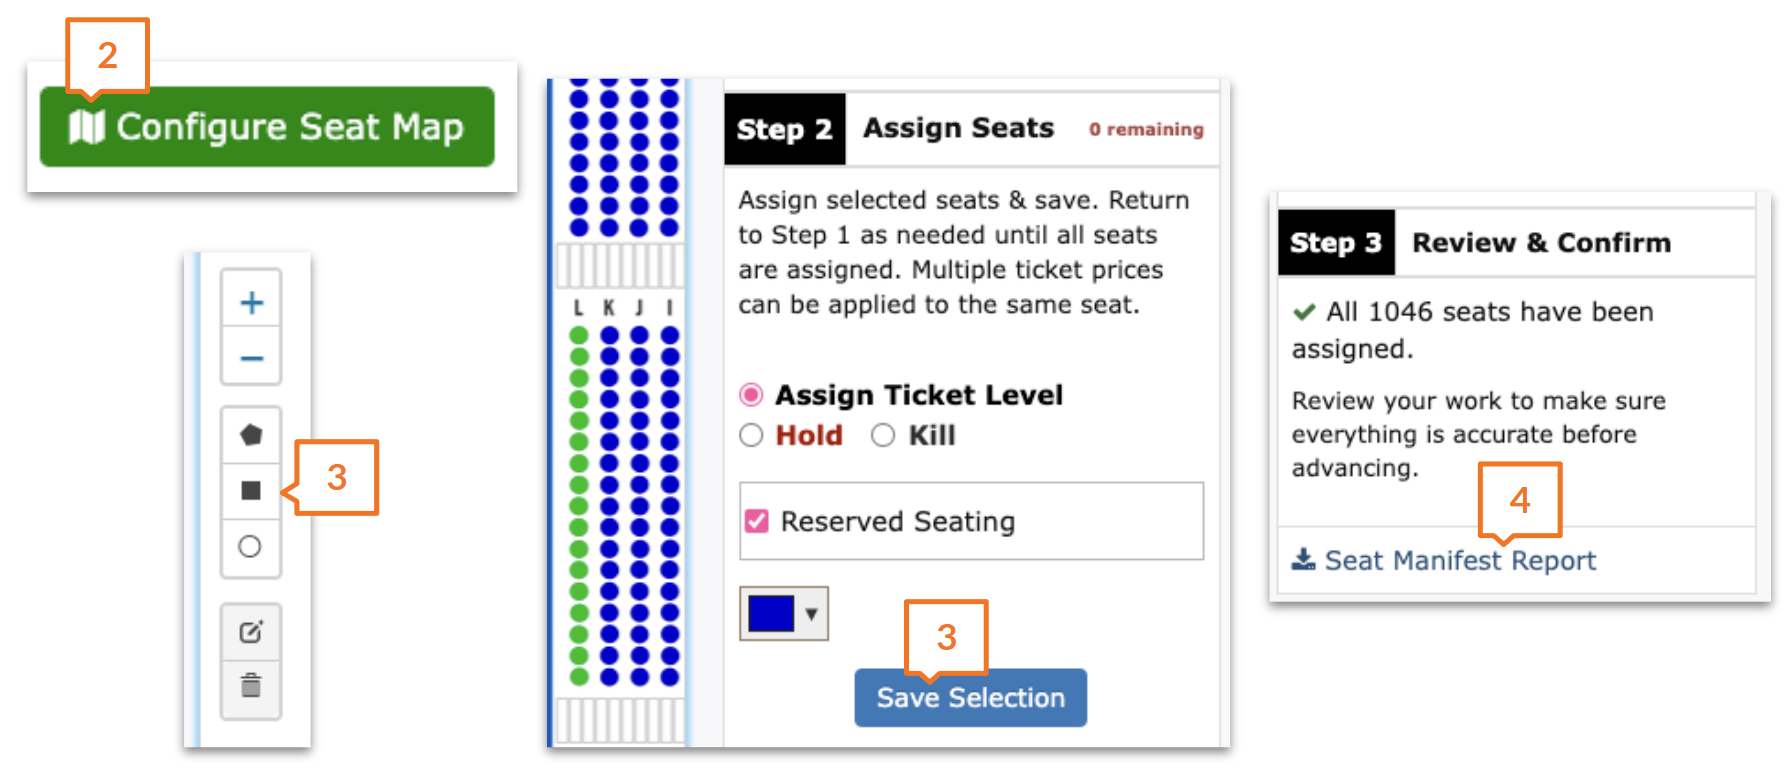
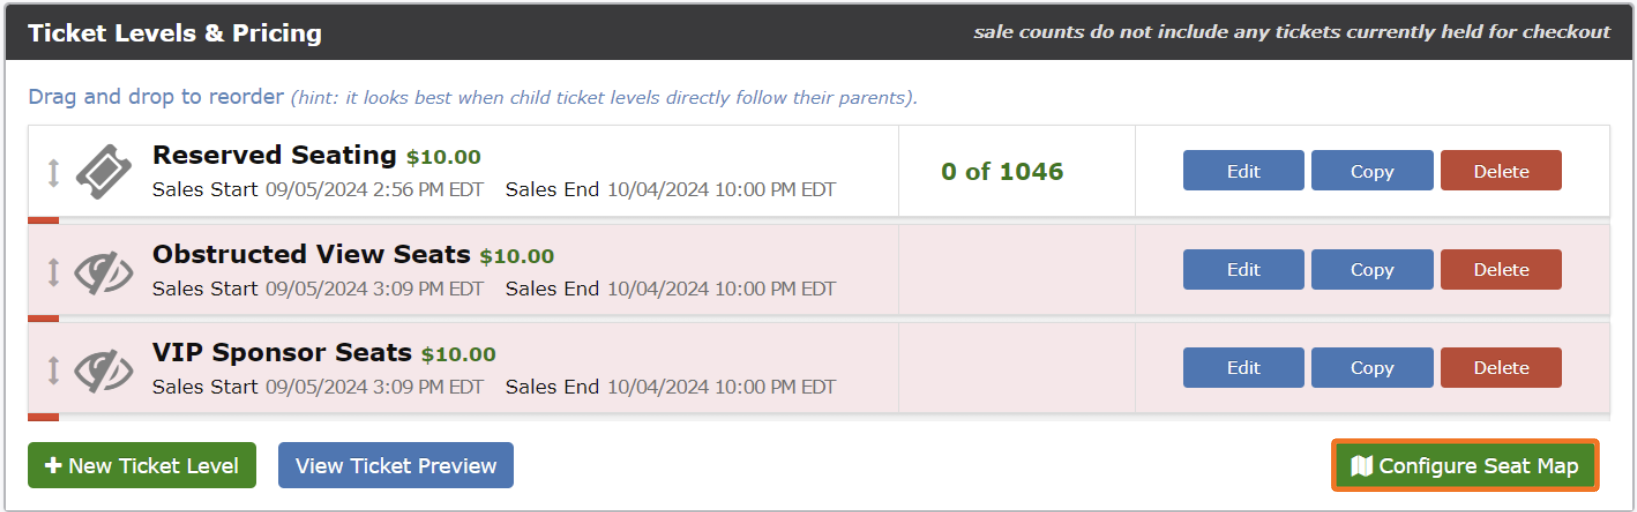
Under Ticket Levels & Pricing, click Configure Seat Map.
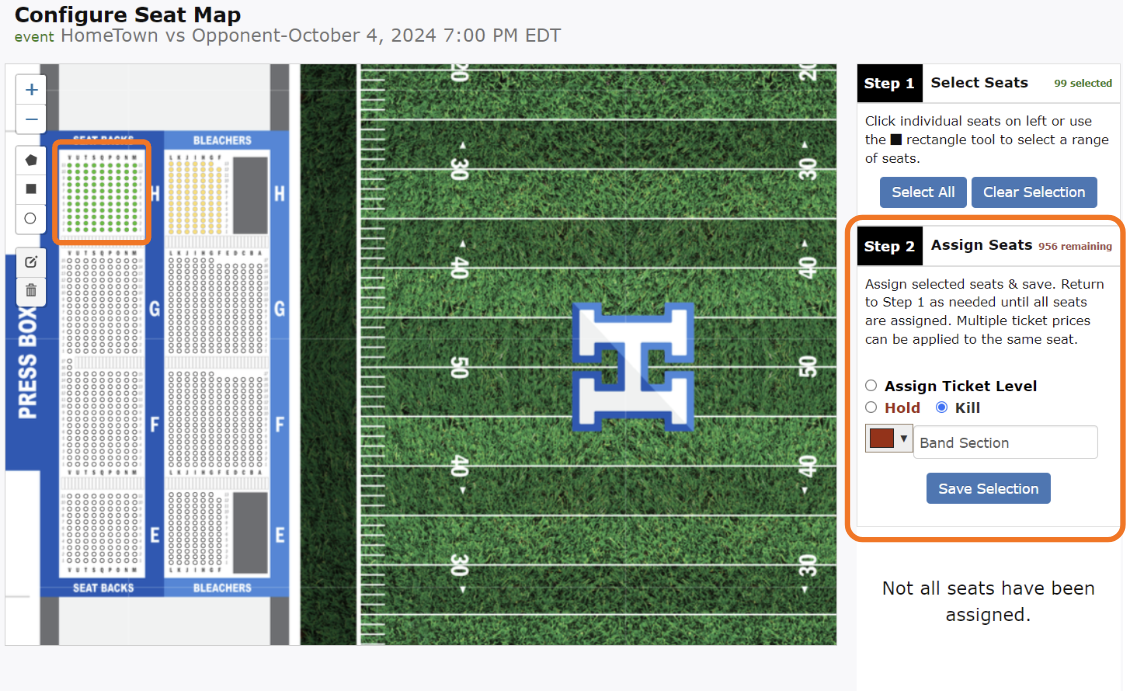
Use the ◼️ icon to be able to click and drag to select a large number of seats that need to be assigned. You can either assign those seats to a certain ticket level, hold them, or kill them.
Ticket Level: assigns pricing to a seat location and is available through any channel (online, Gate App Point-of-Sale, Create Order Tool)
Hold Seats: these seats will be temporarily unavailable until the hold is removed. These seats can still be assigned by an admin in the Create Order tool.
Examples: Admin/Board Member seats, VIP Seats, seats for fans who may not have access to purchase online that you want to process orders for
Kill Seats: these seats will be unavailable everywhere until they are re-assigned to a ticket level, including the Create Order tool. We recommend only killing seats you never want to sell.
Examples: Obstructed views, broken chairs, seats used for media/tech
You can also label Held or Killed seats with by entering a Hold Reason.
After each group of seats has been selected and assigned to the appropriate category, you will need to save that selection.
The Seat Manifest Report can be downloaded to view where seats are assigned. Be sure to click Submit when finished! All seats must be assigned to a ticket level or killed in order to submit.
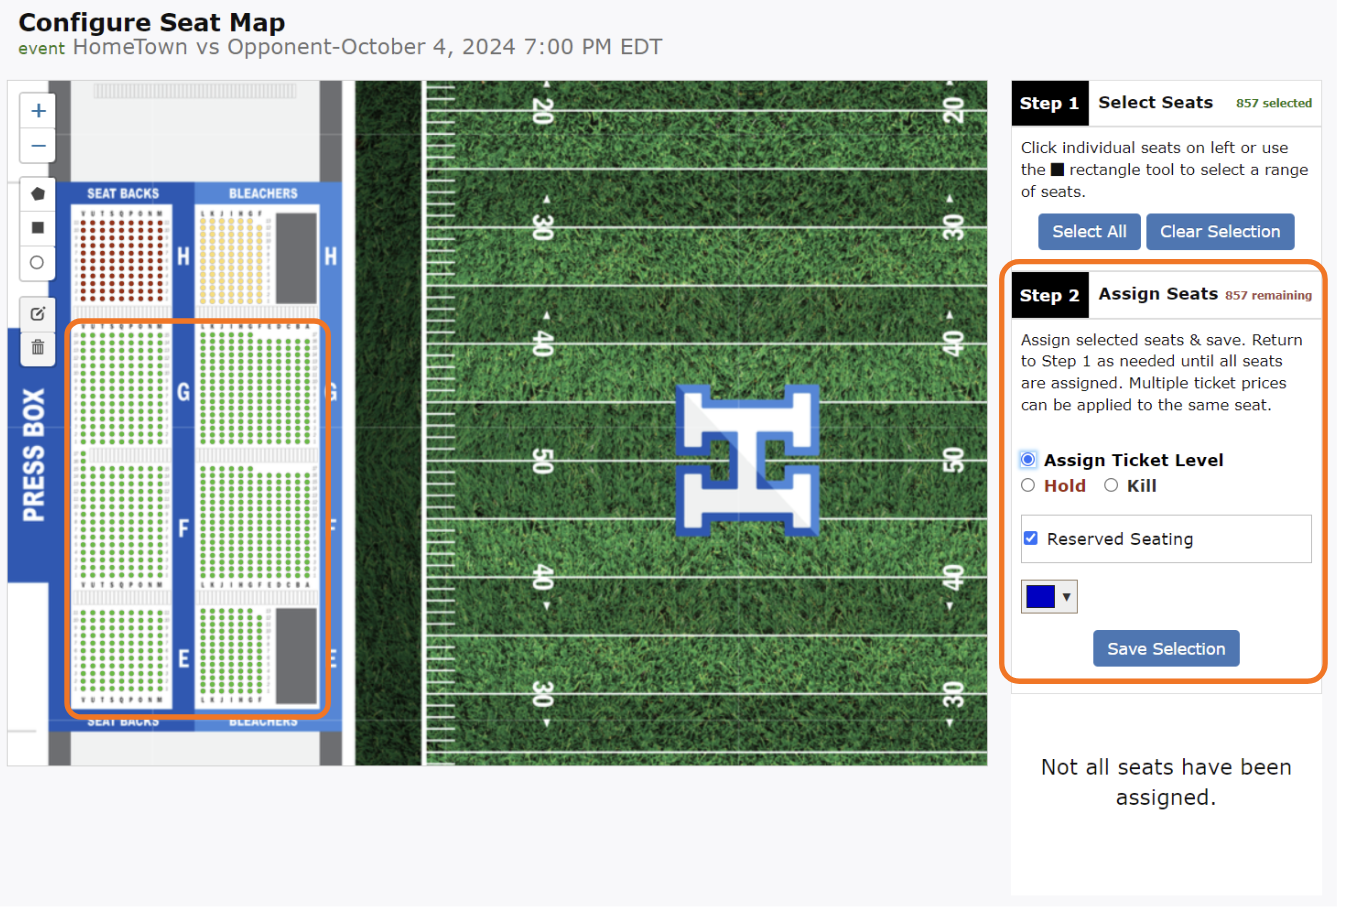
Assign Ticket Level
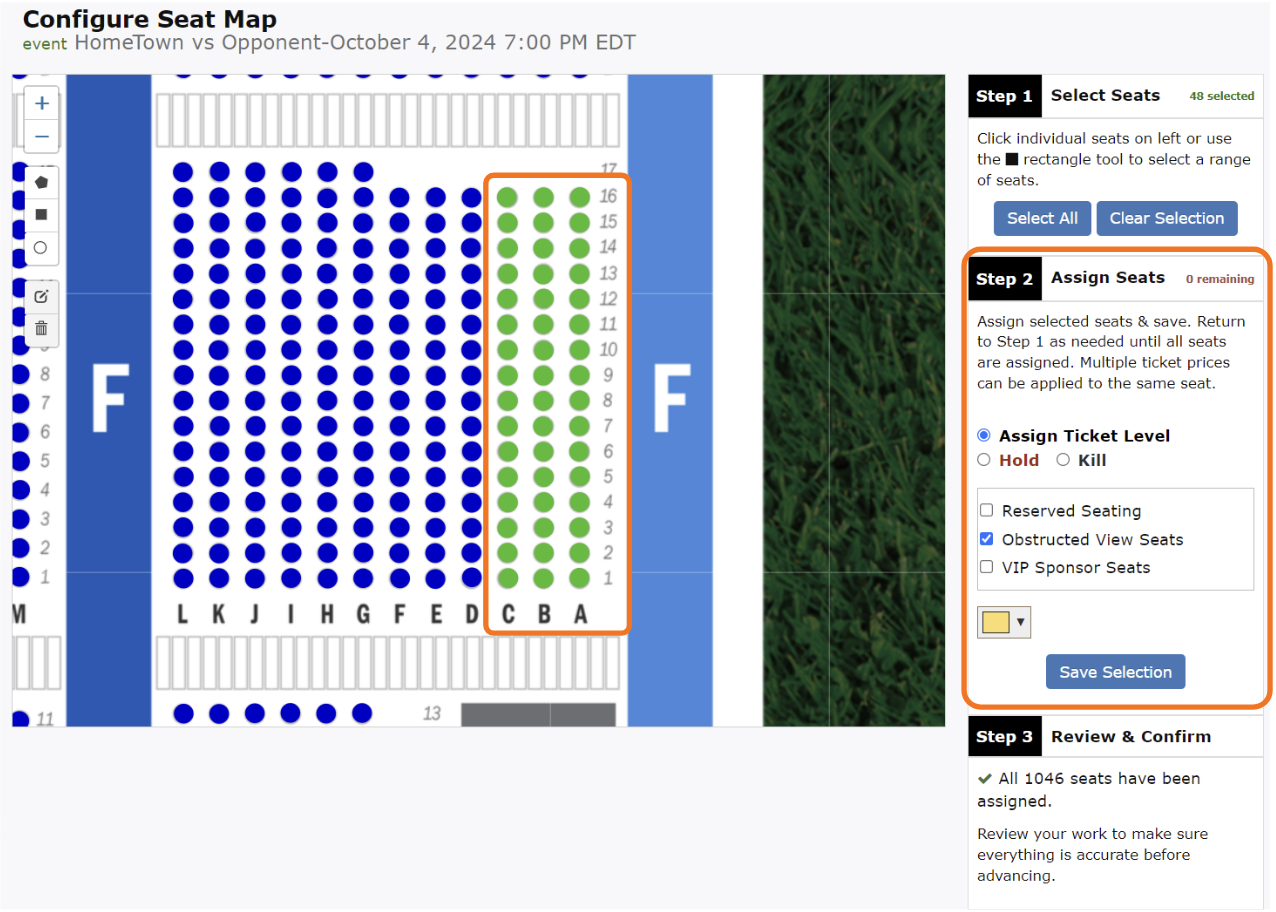
To assign seats to a Ticket Level, first select the seats and then select Assign Ticket Level under Step 2. Check the box next to the Ticket Level you want to assign.
Click Save Selection to assign the seats
Note: When assigning a color to configured seats using the dropdown below the ticket level name, that color will be reflected online to fans when they purchase tickets.
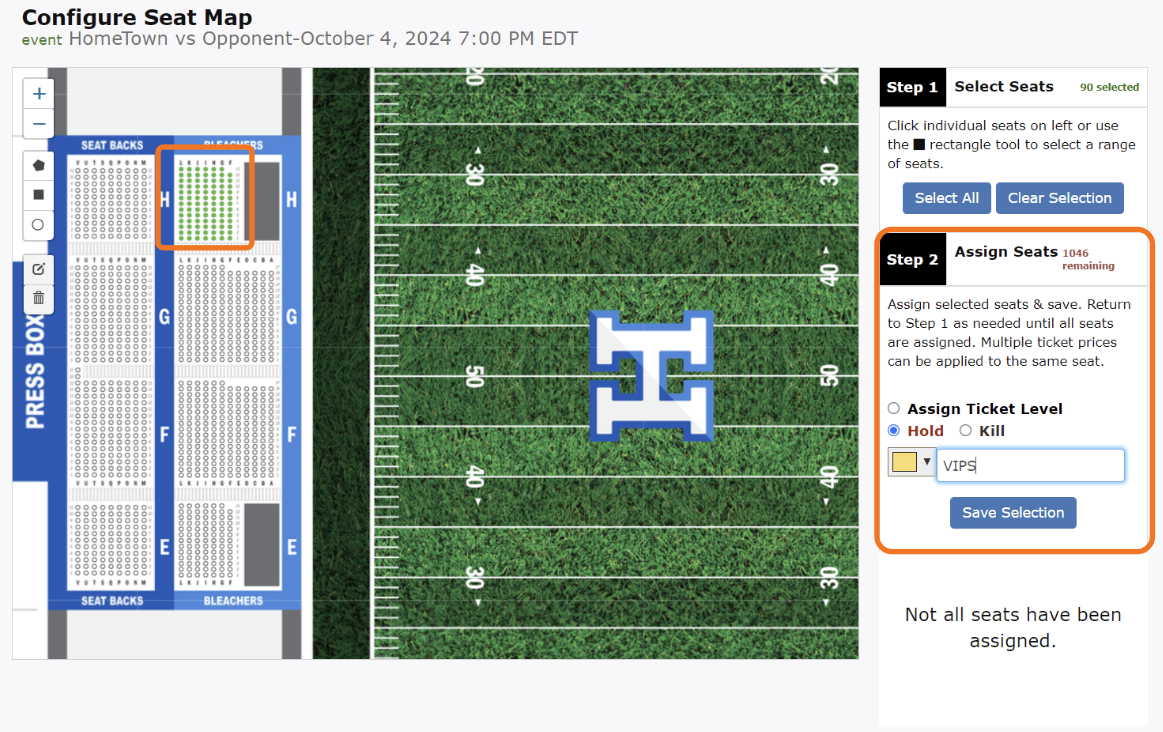
Assign Hold
To assign the seats to a Hold, the seats must first be assigned to a Ticket Level
Once assigned a Ticket Level, select the seats you would like to hold, and select Hold under Step 2 and enter a hold reason.
Click Save Selection to assign the seats
Note: Holds can be used to set aside seats for VIP fans, Coaches Families, etc. These seats will not be available for the public to purchase.
Assign Kill
To assign seats to a Kill, first select the seats, and then select Kill under Step 2 and enter a reason.
Click Save Selection to assign the seats
Note: Kills can be used to set aside seats that you do not want to sell for a specific event. For Example: Obstructed View seats, Band seats, broken seats that cannot be sold.
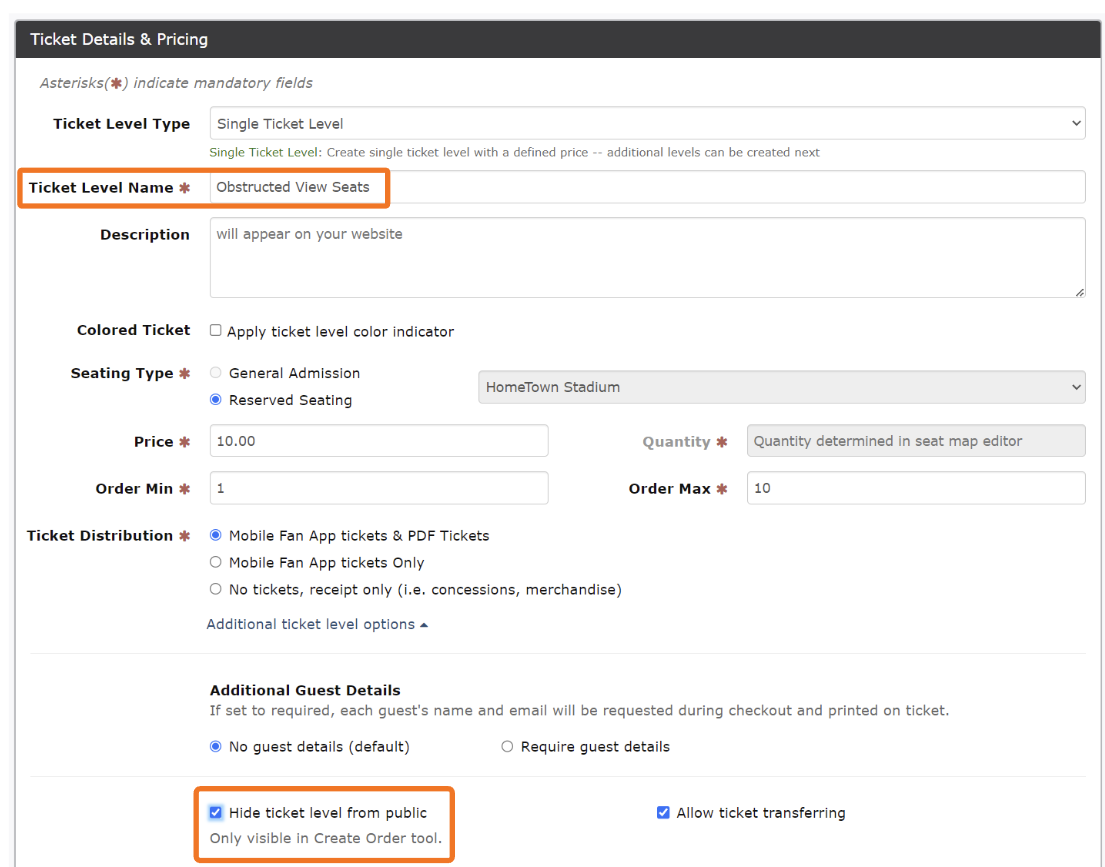
Assigning Kills & Holds as a Ticket Level
Kills and Holds can also being assigned using Ticket Levels.
Create a Single Ticket Level. For the Ticket Level Name, enter the reason for the Kill (ex. Obstructed View Seats) or Hold (Ex. VIP Sponsor Seats).
Select the Hide Ticket Level from Public option. This will hide those seats from the website, but you still will be able to access them through the Create Order tool.
Select Configure Seat Map to assign the seats to the Ticket Level
Select the seats by using the square tool or clicking on them individually
Check the Ticket Level to assign
Click Save Selection then Submit