.png)
Reserved Ticket Event Setup
If you do not already have a Reserved Seat Map uploaded into your Box Office that is tied to your venue being used for your event, you will need to submit a request with our Production Team.
Hometown Custom Seat Map Request Form
Once all items have been submitted, you will receive a proof from Hometown to either approve or request changes. After the copy is approved, it will be uploaded into your Box Office for future use when building out your events. Should you already have a current seat map in use within your Box Office, there is no need to go through the request process again.
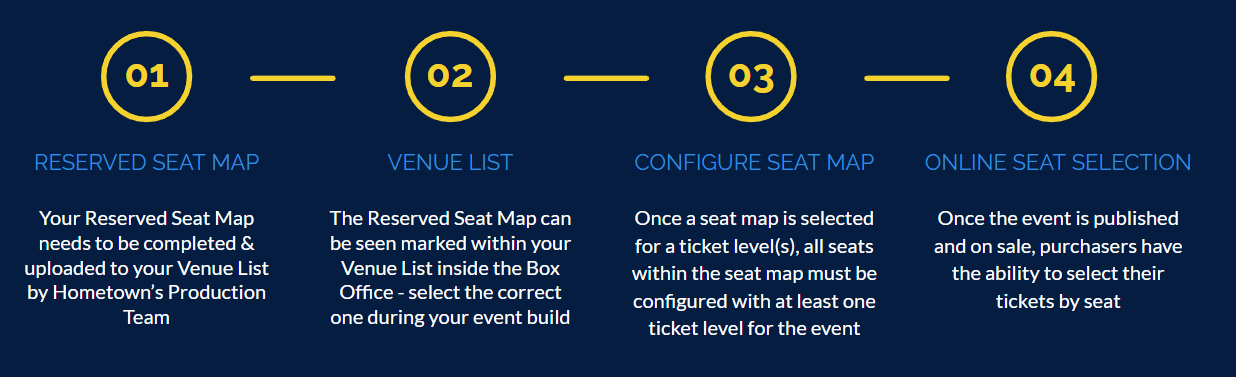
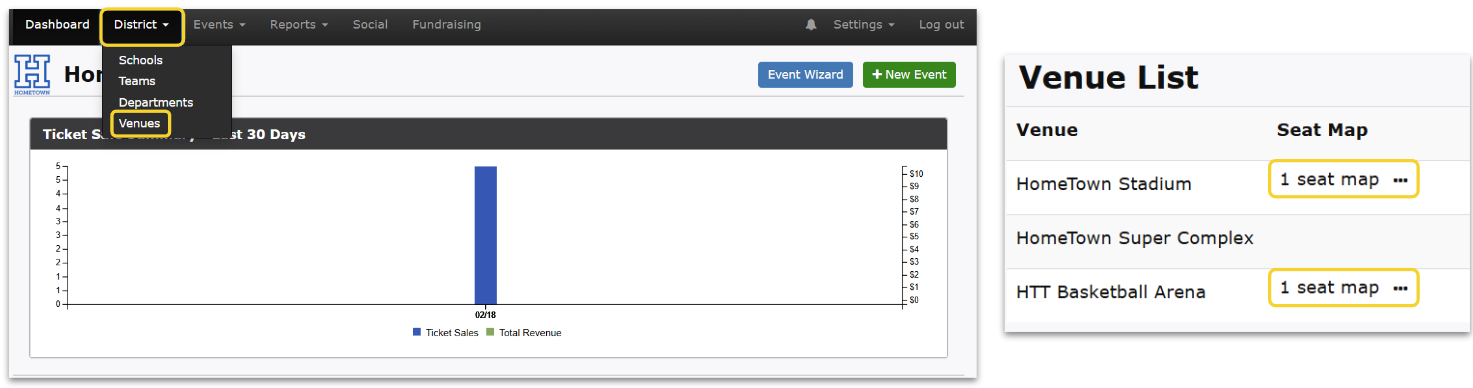
Venue List
Under the District Tab, you will click on Venues - this will bring you to your existing list of venues that have been added and established for use when creating an event. Next to each individual venue, there will be an indication if there is a reserved seat map tied to that venue for use. You will notice under the column, Seat Map, if there is an item listed.
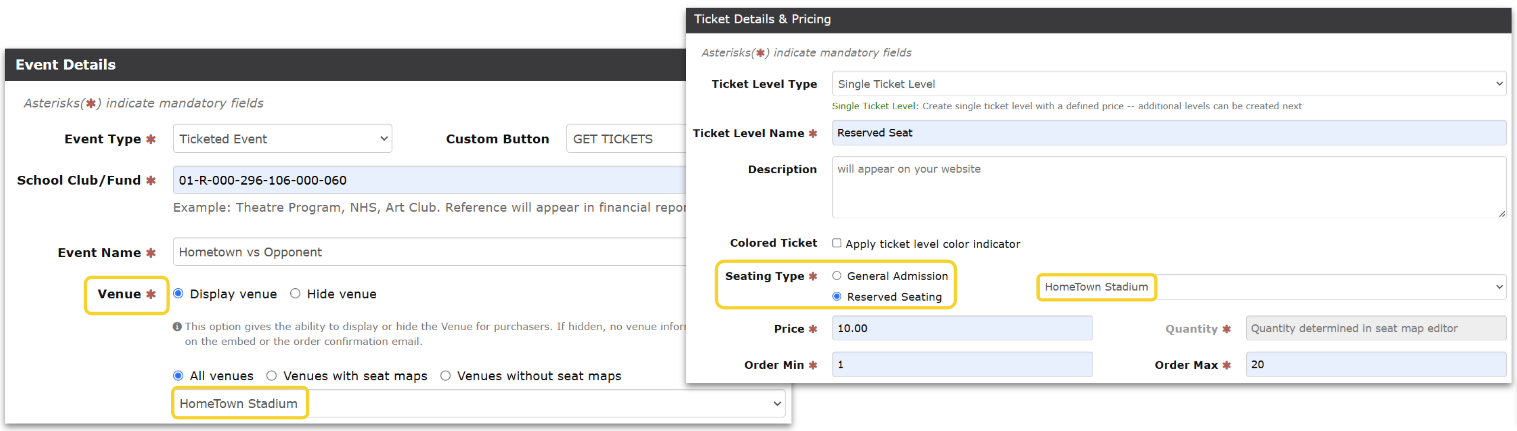
Ticket Levels & Pricing
Now that you have made sure your Reserved Seat Map exists within your Venue List, you can create a New Event. Make sure to select the correct venue associated with the map to be used on the Event Details page during the event creation process.
Select the map to use during the event creation process at the Ticket Levels and Pricing step once you have switched your Seating Type to Reserved Seating.
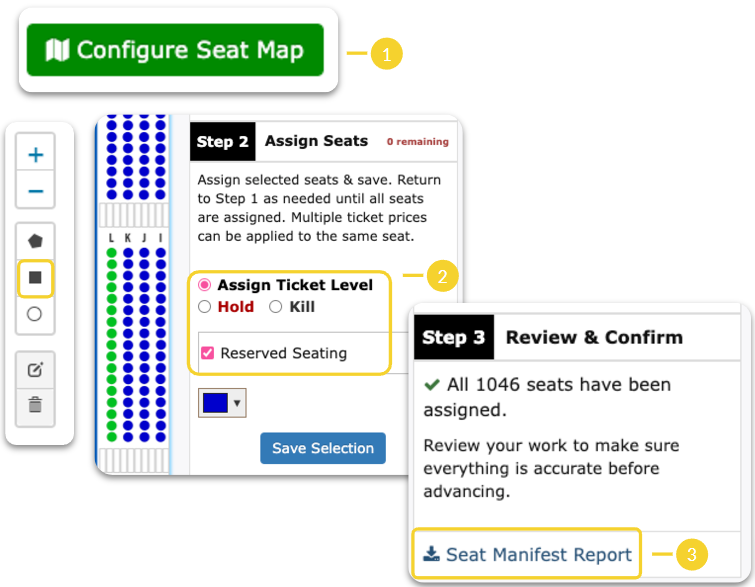
Configure Seat Map
Under Ticket Levels & Pricing, click Configure Seat Map
Use the square icon to be able to click and drag to select a large number of seats that need to be assigned. You can either assign those seats to a certain ticket level, hold them, or kill them.
Hold Seats: These seats will be temporarily unavailable until the hold is removed. These seats can still be assigned by an admin in the Create Order tool.
Kill Seats: These seats will be unavailable everywhere until they are re-assigned to a ticket level, including the Create Order tool. We recommend only killing seats you never want to sell (obstructed view, broken chair, etc.)
The Seat Manifest Report can be downloaded to view where seats are assigned. Be sure to click Submit when finished! All seats must be assigned to a ticket level or killed in order to submit.
Seat Manifest & Reports
There are a few reports that will help support your Reserved Seating needs:
Manifest Report
This will download as a csv file, where you can see all of your reserved seats listed and their assigned status. The manifest provides a clear view all at once to see those specific seats Assigned, Held or Killed.
Guest List
From within your event, you can access the Guest List under Box Office Tools. You are able to view all of the information from inside the Box Office or you can export the Guest List to a csv file. From here, you can view all of the information pertaining to the purchased tickets. You will be able to see Name, Email, Ticket Type (Reserved Seating or General Admission), Order ID, Section, Row, Seat Number
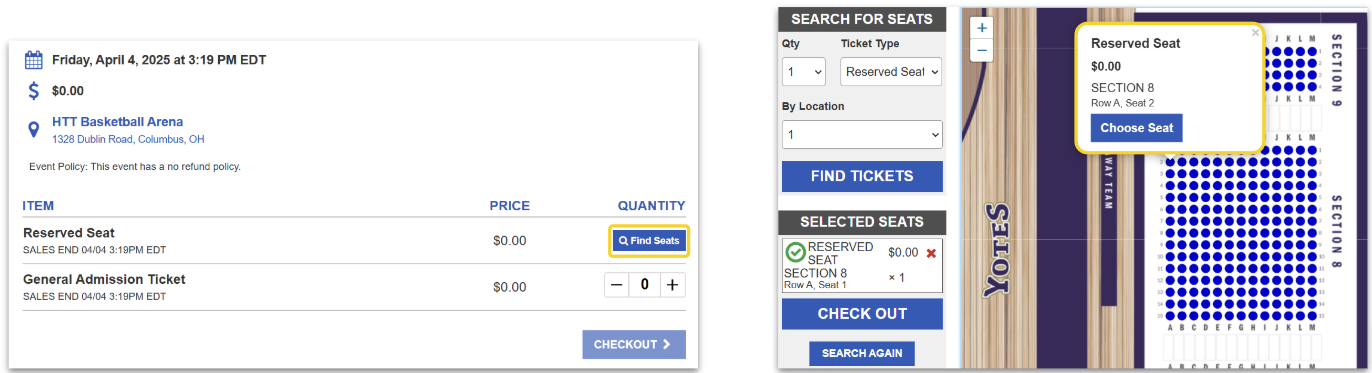
Online Ticket Purchasing
Purchasers will locate the event online - they will be able to understand the difference between Reserved Seating and General Admission, if you have both options available for purchase. When looking to select their own reserved seat, they will select Find Seats.
The reserved seat map for your venue will appear on the screen for the purchaser to view the available seats and select those that they wish to add to their cart. They will proceed to checkout.